Thursday 23 August 2012

How to make a larp boffer scottish claymore

That is it! You positively need someone dead! No, you don't call a GM! You don't call a wizard! You don't call a dozen archers! You get a big damn two-handed sword to put him down on the ground for good!

The Scottish claymore(don't mix it with the basket-hilt)  is the first large weapon design I post. This is for advanced fighters only - standing at 135 sm, the weapon can be dangerous in inexperienced hands. Get good with it though, and you'll love it. Well, killing seven with one strike might be a bit hard - my record was 3 at once.


BUDGET - about 15-20$ - the weapon itself is almost twice the size of a normal sword. You'd need a bit more of everything. 

MATERIALS: Polipropilene pipe F32 about 1.20m long (optional - piece of pipe size F20) Foam, tapes, plastic bottles, leather or substitute to wrap the handle. Something for the counter weight.


TOOLS: Usual.


This is again a recycled old weapon, actually from my first weapon ever made years ago.


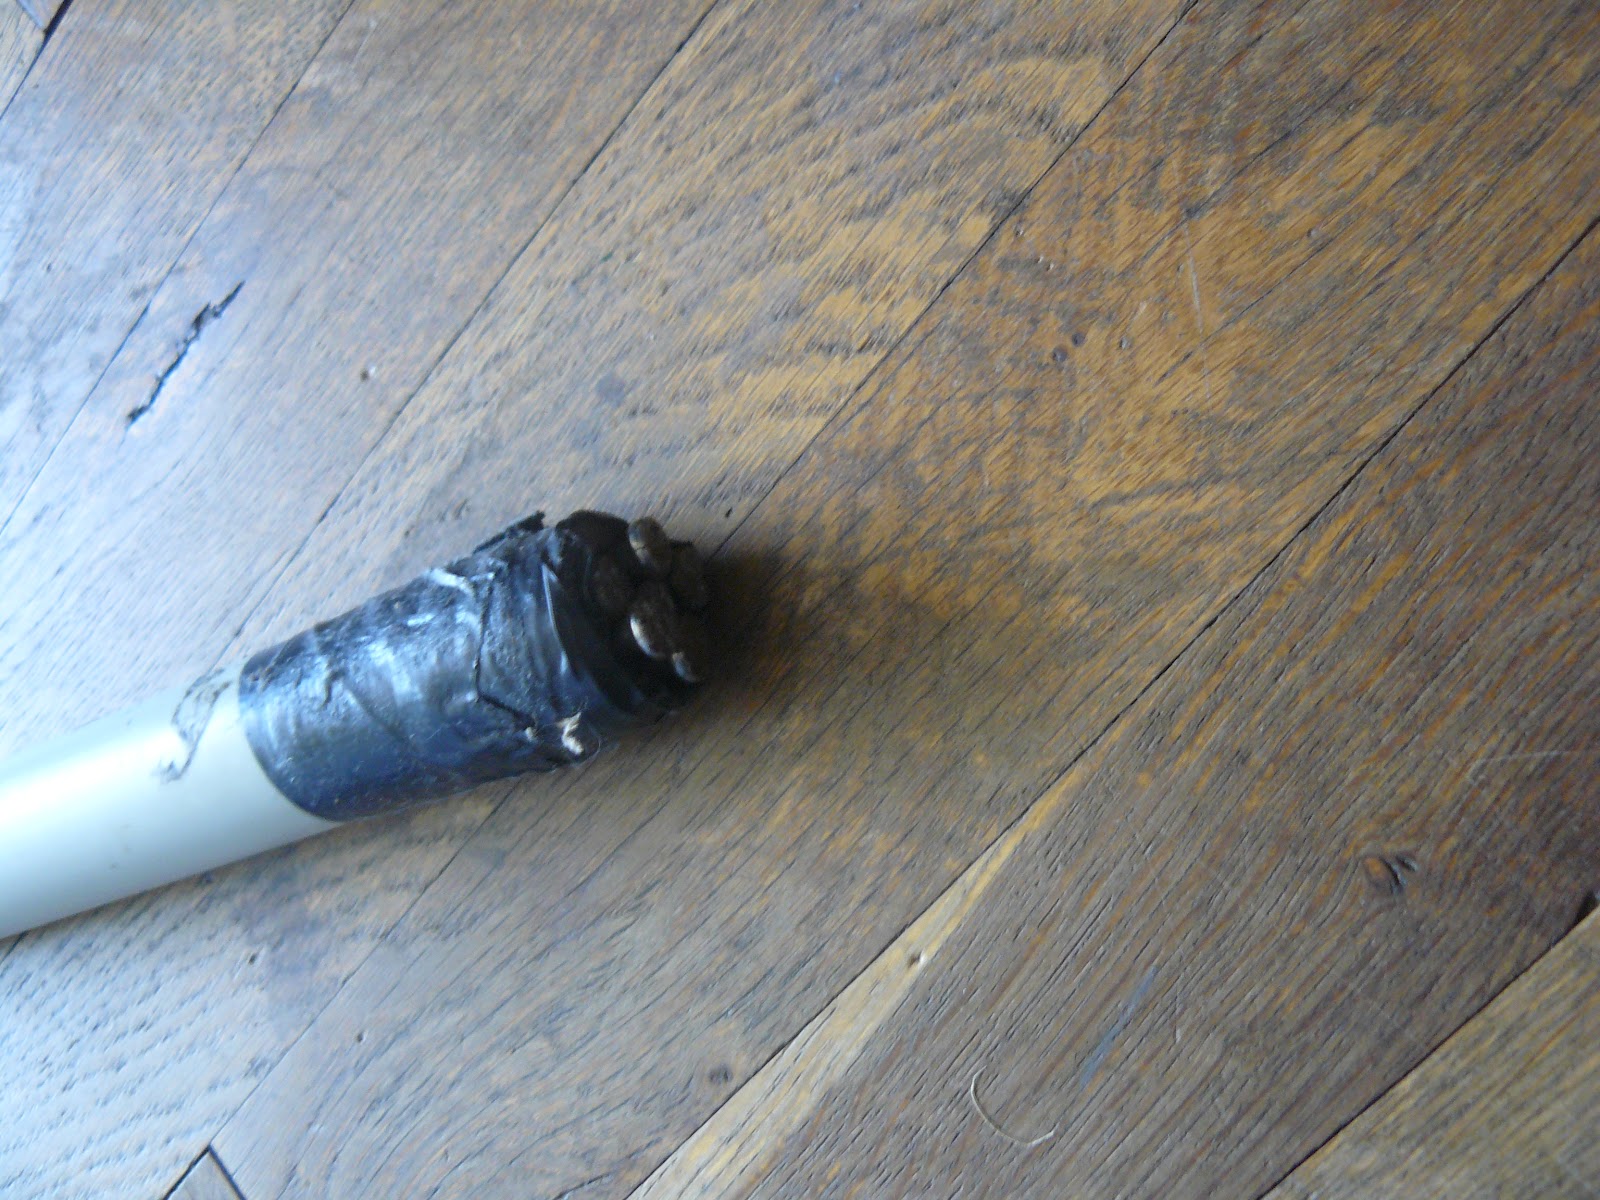
As such, it already had its own special counterweight made from a big bolt, a metal water valve and some nuts and rivets for extra weight.


Here's the optional part with the 2nd pipe piece. The F20 can just barely fit inside the F32, and will make it less springy(also it will again help with the balancing) You don't have to do it if you think the weapon becomes too heavy.


 After the 2nd pipe is fitted inside, a basic measuring is done to decide where to start fitting the guard.
 Next, the handle is given two pieces of hard flip flop foam to make sure the sword is steady in the hand.
 Now its time to make the guard. Anyone who'd read some of the previous guides can guess that I'm about to murder a ton of plastic bottles...And I did. The claymore has a bigger guard piece than a normal sword and thus required a lot more layers of plastic.


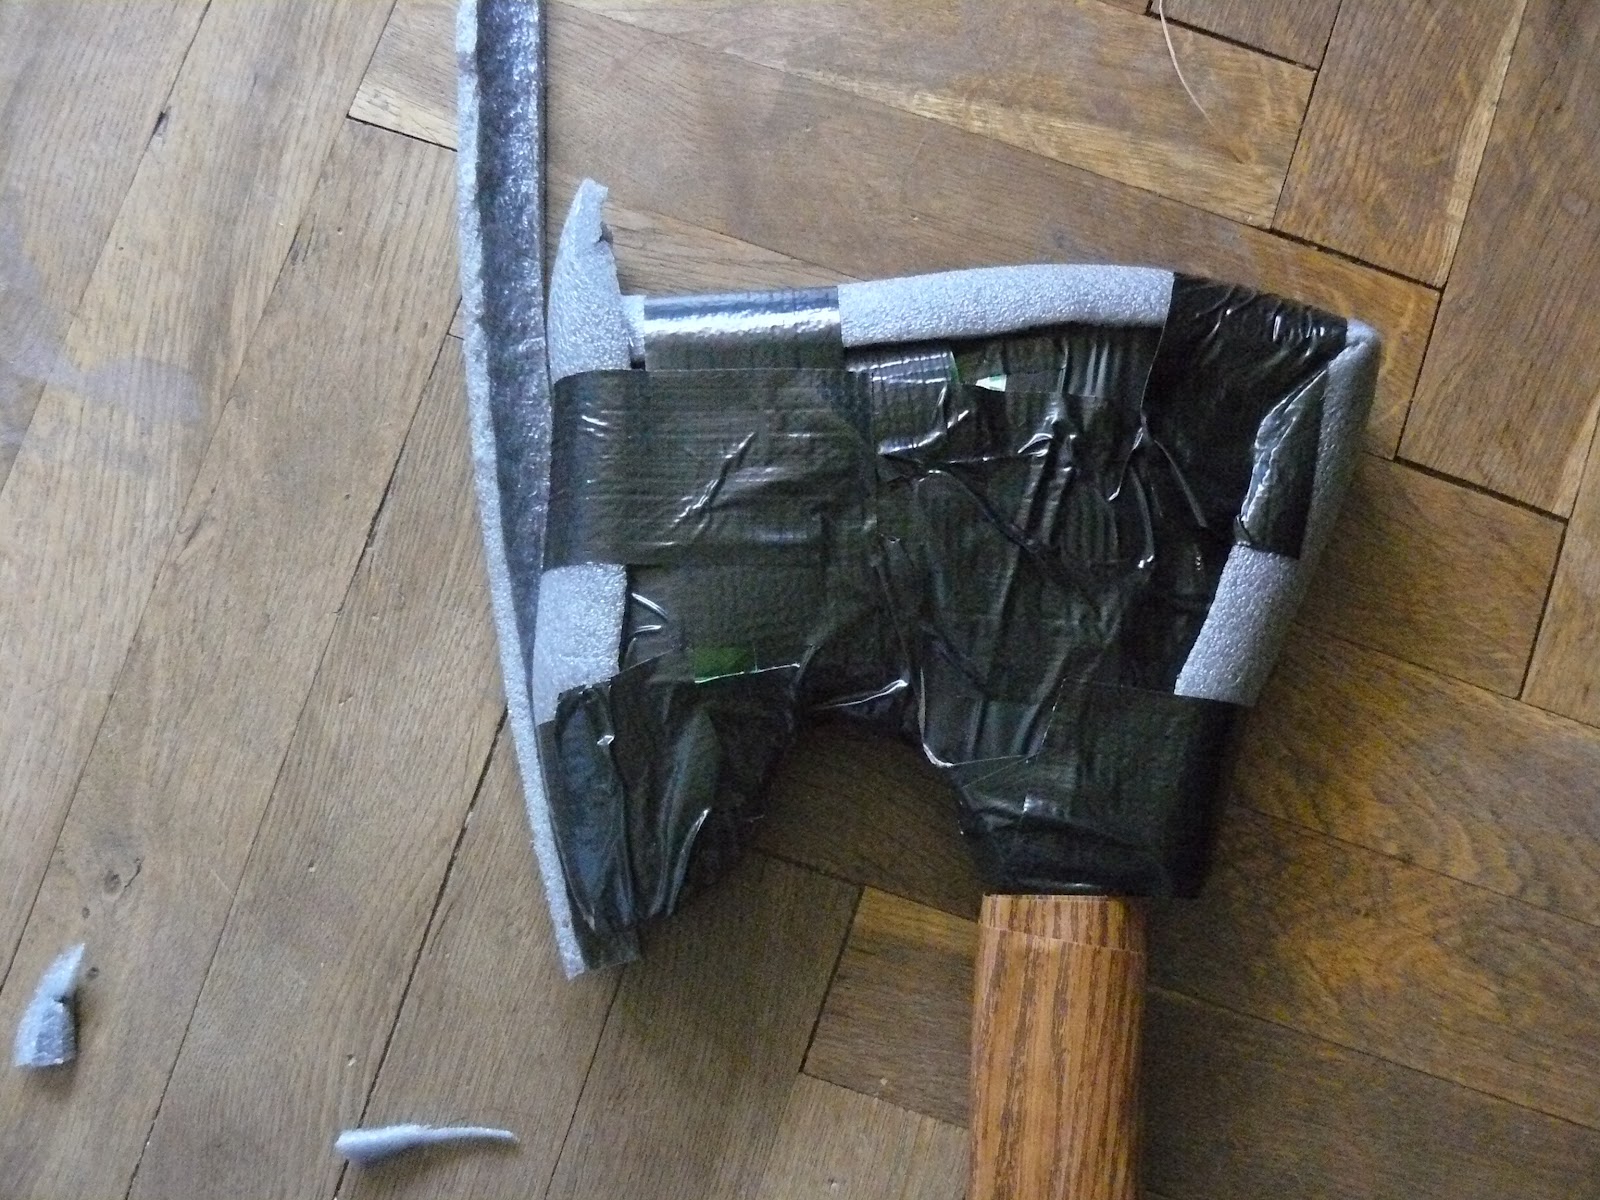
 To ensure it stays where its supposed to, I actually nailed it to the pipe(thus securing the twin pipes together as well)
 After that - its business as usual, leather is glued on and secured firmly with tape on both ends.
 The blade is the more specific aspect of the claymore(and any type of great sword) You can't skip on protection and make it slim. The pipe is quite and heavy big itself(but without it it would be a spaghetti sword...) and hitting someone with the flat will hurt like hell. Therefore - two thick layers of foam are used. I was thinking of a 3rd, but gave up - it was becoming too thick.

 Finally the claymore is done. Here you can see it again in full size and in comparison to a 1 handed sabre.


 I tried again to follow the model of a real claymore, but alas - boffer limitations can be annoying sometimes.

Wednesday 15 August 2012

How to make homemade larp potions

In the previous post on the alchemist props I mentioned potions as the "classical" result of his doings. However - items from a chemistry will be a poor choice to make larp potions from. They are fragile, expensive and hard to replace. Buying a whole chemistry set only to use the vials is a bit counter productive.

So - how to get cheap easily replaceable and sturdy larp potions?

Well - here is a simple answer that costs roughly 2$ a piece.  I'm not going to give tools and materials list since they depend on how you want to decorate them. I used some canvas, thread and glue, but leather, paper labels and so on are not out of the question. In fact I might do a small collection of potions with different decorations as an example. For now though - I got only one.

 
The one main "ingredient" though is this. Its a whiskey mini bottle. We call them bullets(since they contain exactly one shot...get it ;) )  You are most likely to find them in the 24/7. In this particular case I picked a mini JB bottle - Its small, cheap and above all - made from plastic. That means it won't break no matter what. Naturally this is a magic potion by default but I drank the fire water already. Other types can be used as well - I simply found this one first.
First thing to do was the scrub the glue from the label and prepare it for decoration. Here we get to the wild card. You can use canvas, leather, paper, thread, a cork too. Whatever rocks your boat. In my case - I used canvas and thread.
I glued some canvas on the body of the bottle and while it was still drying up - grabbed some orange thread I have here. Same used in the leather mitten guide.
 Gotta be careful with the glue of course you don't want to poison yourself or glue the bottle shut. Apart from that - in a couple of minutes its all dried up and ready for use.
 This took me just a couple of minutes to make. You can turn out a dozen in half an hour.


Monday 13 August 2012

How to easily get props for an alchemist player or npc

Now contrary to popular belief - its not all boffers and beanbags... sorry I meant might and magic of course. There are always others  seeking to get what magic does by harnessing science. Science of course in this case often meant leeches and mixing stuff in the test tube to see what happens when we drink it. Sometimes you win - sometimes you lose.
  
 Meet the alchemist.


Now whether its a player's stuff, or an npc it doesn't matter. Whether he'd be seeking a Philosopher's stone, trying to make gold from lead or just selling potions of strange origin and even stranger effect its entirely player/GM concern. Still if there IS such a character he needs his stuff! The robe, the big dusty books, the glasses and so on are easy. Buuut there is another bit  necessary. You need vials. And test tubes. And something boiling that's making bubbles. Guess that leaves only one choice. 

Buy a chemistry set. 


There are many on the market and they vary greatly in price and content, ranging from 30-40$ to 200$+.
Obviously 200$+ is too much for a piece of props, so we will aim for a cheaper one. What you need to look for is the content. 

Here's what I found in the attic. Its a junior chemistry set that's more of a vintage item if you ask me, hailing from Ye olde socialist days.

It has a ton of vials, most of them still full. All I have to do is change the labels with something more appropriate. 

One more thing which I'm going to put in big red CAUTION marks. If you want, you can actually use the contents of the chemistry set to do some simple trick or reaction. That is entirely up to you, just be careful and read the damn manual before trying something. Don't use the vials for useable ingame potions. They are fragile, irreplaceable and were holding(sometimes) dangerous chemicals.  For ingame potions that are to be drinkable, there is another solution which I 'll show you soon.

Wednesday 8 August 2012

How to make a larp boffer fighting axe

Hello everyone, sorry for the long hiatus. For today we have one of the last one-handed weapon types left. The fighting axe. Now this guide won't be covering the whole process from start to finish, since it shares a lot of similarities with the guide on making a war hammer.  Therefore I'll basically pick it up from the point where the two are starting to branch off.


I'm not going to repeat the whole mumbo jumbo about tools, supplies and budget since its the same as before. Just make sure you are using a stronger core (F25)- too thin pipes will bend a lot.

What you want to do - is follow the warhammer guide until  the point where you start shaping the head.  For the record, here I'm recycling an old weapon again so I kinda start halfway finished. Yeah I'm big on recycling if you haven't noticed by now.

The head is for a single edged axe, if you want you can make it double edged - its not an issue. What you need to do though, is make sure the head is one idea tougher than the warhammer - since its bigger it has to be stronger as well.


The axe already came with a counterweight fixed in. Note that the axe will have a frontal center of balance - its how it should be anyway - we are not making a sword after all. Still, a counterweight and pommel will help with easier control and handling. 

 After that scraps from flipflops that were turned into soft knives the week before, are taped to  the core. This will help with having a better grip and keeping your buddy safe from accidental hits with the pipe.


 The final piece added is a pommel from a water tap valve, full with large coins. Its enough to move the balance to the middle of the axe. You'll still deliver stronger blows than a sword.
 Wood texture wallpaper is placed ontop to finish the shaft. This time it didn't stick too well, unfortunately. Having a second pair of hands would have been invaluable.

 Finally some leather for the handle grip and we can move to the edge.
  
 The head has several layers of foam along the blade to compensate for the heavier head.
I eventually settled for 3, as well as 2 more for the rear of the axe. One thing I should have done is decorate the axe head, but I had nothing suitable for the job at the time. Maybe later. Last thing to do is put the aluminium foil on  and we are finished.